I've never sewn a quilt before with mostly black fabrics before. But I decided to with these fabrics. You can see my quilt blocks below.
I would have used a solid background but didn't have enough of the right color at the time. You can see in the picture below I matched the fabrics up with some Art Gallery Fabrics Pure Solids. I really liked the darker color and would have used it but didn't have enough and since I made the quilt top in India I couldn't order any. I think the darker color is Sandstone and the lighter color is Creme de le Creme. Both would go well with this bundle.
This bundle is a great classic bundle which would look good in a variety of projects. You can purchase your bundle here.
The second bundle I curated for you all is called the Bundle of Fun. My husband helped me name it. :) It has so many fun colors and patterns and reminds me of going to a market in India. You can see the bundle below.
I actually have several variations of the bundle in my shop, some with more fat quarters, some with less. You can get a look at them here.
This bundle is so fun to work with. The fabrics play together well. I decided to make one of my Old Muscat Souq Quilts with this bundle. You can see the fabrics all cut and mixed and matched below.
Below you can the progress of the blocks and how the fabrics are looking when sewn together. I am loving it even more than I thought. But I love bright colors!
Both bundles were fun to curate for you all. Check them out in my shop and get yours before they are gone.
Hidden Shapes is my modern quilt pattern using three different skill building blocks for beginners. This pattern includes the square in a square, flying geese and four patch blocks. These are all blocks used frequently by quilters in patterns. They are also good blocks to master when you are a beginner quilter. It took me a while to master the flying geese block, in fact, it still causes me frustration now and then.
This quilt pattern isn't suggested as your first quilt pattern. However, it's a great beginner quilt pattern to practice consistent 1/4 inch seams.
Hidden Shapes is fat quarter friendly. That's why I made this one from my stash. Along with the fat quarters, the pattern calls for background fabric and an accent fabric for the square in a square blocks.
Even though it is written for fat quarters, Hidden Shapes could definitely be made with scraps. I think the more fabrics you have the more fun it will look.
The first quilt I made of this pattern was a baby. It turned out so cute! You can see it here.
The second quilt I made of the Hidden Shapes Quilt Pattern used all solid fabrics. You read about it here.
This Hidden Shapes Quilt was really fun to make because I looked through my fabrics and chose some of my brightest fat quarters and fabrics. I wanted the colors to be bright and cheerful (which most of my quilts are).
Choosing the accent color from my stash was a little harder. This is a throw size quilt and 1 7/8 yards of fabric are required for the accent fabric. I don't have yardage of fabric that length in my stash unless I am going to use it for background fabric, which means it's usually a neutral. The other large pieces of fabric in my stash are ones I am going to use for backing. This was intended for the latter.
Backing fabric is easy to come by and this blue was such a great color choice to go with these fabrics. Plus, I wanted to try out this pattern with a contrast in fabrics for the first time.
The background fabric used in this quilt is from the Add It Up line by Ruby Star Society. The color is Chambray.
I love when the blocks first start coming together. You can see my flying geese in process below.
As I said before the Hidden Shapes Quilt Pattern is a great pattern to work on specific blocks. I always have a bit of trouble getting my flying geese just perfect. Maybe I am not precise enough in my sewing.
These flying geese blocks are fun to make because each side is a different color. You can see below my progress on trimming. One thing that really helped me make peace with flying geese was buying the Wing Clipper ruler. This is literally one of the best things I have bought for quilting. It makes trimming so easy.
I like to sew the rows together for this quilt without worrying about block placement in the quilt. The rows can be flipped if the same fabrics are on the same side when laying out the rows. I like to sew all the rows together using a variety of fabrics in each row. Then, I lay out the rows and switch them around or flip them until I like the fabric placement.
Oh, the beauty of a finished quilt top!
For this quilt I ordered some fabric from a local company who makes hand, block printed fabric (I'm in India, so I have access to some amazing fabrics). I had fallen in love with the print when I saw it on their website.
The backing fabric is a very light weight, soft fabric. It was a bit challenging to baste because the fabric kept shifting. I spray basted to help the layers stay together.
I quilted using a zigzag stitch 1 inch apart. I checked the back several times to make sure the fabric wasn't puckering.
I keep my quilt rolled up (as above) when I am not finished to keep the wrinkles out and so anytime I have time I can sew a few rows.
This post contains affiliate links from which I may get a percentage of purchases.
I have made the Hidden Shapes Quilt Pattern three times and each time it comes out completely different looking. Why? You decide which fabrics you want to highlight in the quilt and you decide which direction the flying geese go in.
This pattern is fat quarter friendly so you can easily grab your fabrics and get sewing, or pull fabrics from your stash. The accent fabrics used in the flying geese and four patch blocks are cut from the fat quarters. In this quilt I used more fat quarters than the pattern called for to add in more colors.
Someone asked me if you could use scraps for this quilt. The answer... Yes! It would be very easy to use scraps for the flying geese especially. The pattern is not written for scraps, however the number of squares needed is listed, so you can easily cut the number of squares required from scraps.
I really just want you to make this quilt pattern your own! Use scraps, add as many fabrics as YOU want, put the flying geese in the directions YOU desire. Have fun with it!
I kind of think the Hidden Shapes Quilt looks like a party in a quilt because of all the colors. So you make it the party you want it to be. ;)
Hidden Shapes comes with four sizes:
This quilt is a throw and as you can see it is on the generous size. I love a large throw quilt, so I like to design them on the bigger size.
If you are new to quilting and haven't made any of these blocks before I have some tutorials to help you out:
The Fabric A, or the fabric used in the square in a square blocks, is a Speckled Fabric by Ruby Star Society. I can't remember exactly what color it is. However, it's close enough to a neutral color that I knew it would go well with all the colors in this quilt.
I basted this quilt with pins on my kitchen table. Then, quilted it with straight lines on my machine.
The backing and binding of this quilt is also a Century Solid Fabric. I chose the fabric to match a bright green from the front.
This quilt is one of my new favorites. It's all me. It's bright and a whole bunch of colors. Most of all it's just perfect even if some of the points aren't.
If you make your own Hidden Shapes Quilt share with me on Instagram: @thenomadicquilter I would love to see your version!
This blogpost contains affiliate links from which I may get a percentage of purchases.
I named this the Hidden Shapes Pattern because when I started designing it I wanted stars to stand out in the quilt. The square in a square blocks create stars with each four patch and each flying geese block. However, I realized when I made the quilt the stars don't really stand out like I originally thought they would. Hence the name, since the stars are hidden and there are just a lot of different shapes going on.
As I said this quilt pattern uses flying geese. If you are new to quilting this is an important block to learn. It can be frustrating if you haven't done them before. I suggest practicing on scrap fabric until you have the trimming down. You can find a tutorial for flying geese here.
The four patch is also a very common block. The first quilt I ever made had four patches in it. I love this block because it's easy to get a nice point with and there are multiple ways to make them. You can see four different ways to sew a four patch here.
Lastly, the square in a square block is also a well known block. This is a good block to have in your tool belt if you don't know how to sew it yet. The pattern uses a no waste method, so no fabric is thrown away. You can find a tutorial here.
What do I love most about this quilt pattern? It's just fun! It reminds me of a party. I love all the fabrics you can use, combined with the accent and background fabric. I wanted to call the pattern sprinkles, but I think there was another pattern with that name.
The Hidden Shapes Quilt Pattern has four sizes options:
This quilt pattern is beginner friendly, but it assumes the quilter has basic quilting knowledge and can sew a consistent 1/4 in. seam.
This quilt was made using a bundle I had bought a while ago. I loved the combination of fabrics and wouldn't have thought to put them together. The fabrics are from one of my favorite fabric companies, Ruby Star Society.
I also happened to have a good bit of scraps of the accent fabric (Fabric A) available. I had used this fabric previously for the backing of a quilt. This excess was cut from the edge of the quilt. I had sent an oversized backing. I had just enough of the soft pink fabric to use for the square in a square blocks and it went so well with the bundle. Plus, I didn't have to buy any fabric!
The flying geese blocks in this quilt are placed in random order. This makes the quilt fun and you get to choose the final look of your quilt. I personally like to mix it up and randomly place them different directions.
I quilted this quilt myself. It's so fun quilting baby size quilts. If you are new to quilting, baby size are a good size to practice on. It's easy to pull the quilt through the machine and maintaining straight lines or a design is a breeze.
The smaller the quilt, the easier the basting. Basting is my arch nemesis. I really don't like it. Basting this was easy because this was a baby size quilt. So I basted it on the kitchen counter and used pins.
I started out quilting 1 inch lines across the quilt. I was debating leaving the quilt like this. But I decided to add a line in between at the 1/2 inch line mark. This wavy line stitch is not on all machines. But if you have it, it's a very forgiving stitch.
The 1/2 inch lines made the quilt turn out so cute!
I went back to my local quilt shop and bought backing and binding to match the fabric on the front. I love that it matches and it made it easy for me. Choosing fabrics can be a challenge sometimes.
This Hidden Shapes baby quilt turned out just about perfect. Get yourself a copy of this fun quilt pattern and make a quilt of your own.
]]>
The square in a square block is just that! A square on point inside another square. See the image below. These blocks were from the Colored Glass Quilt which also incorporates this block.
Sew 1/4 inch away from the edge of the fabric. Press seams outward and cut off the little dog ears on the sides.
Next, find the center of the sides of the 4 in. x 4 in. square and the long side of the accent triangles again by giving them a small crease. Line up the creases with the fabrics right sides together. Pin in place.
Sew on each side.
Press seams outward.
It's important with square in a square blocks that there is a quarter inch of overlap of the accent fabric on each side. If there isn't then when the block is sewn into your project the point will disappear.
I hope this helps! If you have any questions feel free to contact me.
Also, try out my patterns which include the square in a square block, Colored Glass and Hidden Shapes.
]]>
Slightly Scrambled uses a lot of strip piecing. Strip piecing is when you sew long strips of fabric together and then cut those into smaller blocks. This makes the sewing process go much faster because you don't have to sew all the tiny pieces together.
You can see below all my strips cut out ready to sew together.
If you have never chain pieced a quilt before this quilt is a great one to learn with. I like to chain piece the blocks. This means I can batch sew them all at once, press the chain pieced blocks all at once, then finish piecing them all at once. It goes quite fast.
Chain piecing is easy to learn with smaller sewing projects like a quilt block, as opposed to a whole quilt. You can find a short video on chain piecing here.
You can see my pile of chain pieced blocks above waiting to be pressed.
I like to randomly piece my blocks together. I just make sure that there isn't two of the same fabrics in the quilt block. But otherwise I do not plan out all my blocks.
I make sure to pin each seam together so that the points will line up. You can see above I put the pins in at an angle so that I can sew right up to the seam before I have to pull the pin out.
This modern quilt pattern is for the beginner quilter.
It is fat quarter, charm square and yardage friendly.
The pattern is written with two variations.
Slightly Scrambled comes with four sizes:
This quilt was easy and fun to make. I love how the fat quarter version gives the quilt a bit of a scrappy look.
I loved the Flowerland line so much I chose the backing from the same line. You can see below the backing and the quilt top all ironed and ready to send off to the quilter.
I sent this quilt off to Knot and Thread Designs to be quilted. It's hard to quilt twin size quilts on regular sewing machines. I have a machine with a larger throat than most and I still don't like to do it. Plus, I already knew which panto I wanted Kaitlyn to sew on this quilt.
Rainbows seemed like the perfect choice to go with all the colors, flowers, and geometric shapes in the fabrics. I usually have a hard time choosing pantos and let Kaitlyn choose with me. But this time I already knew. The rainbows give the quilt a childlike quality which I love and I knew my little girl would love it too.
If you participated in the quilt-a-long, thank you! I loved making this quilt.
Make sure to get your copy of this fun, slightly mixed up quilt pattern in my shop.
Table runners are like a quilt but fast and festive. I thought it would be fun to design and share a quick, beginner friendly table runner pattern for Christmas. Here's my favorite part, because it is quick, you can easily make one as a gift for the next party you got to. Or just make them for all your favorite people in your life to tell them how much they mean to you.
You can download your copy here.
I wrote this pattern with strip piecing to cut down on time and waste. To make this version I used: 1/2 yard of red fabric, 1/3 yard white fabric, 1 fat quarter of green.
I went with the traditional Christmas colors for mine, but I have a couple mock ups for you below which show you what it can look like with other fabrics.
You can download this pattern my joining my newsletter list. Enjoy this pattern and have a happy holiday.
The first time I made the Sunrise Star I used an ombre look by using three different shades of the same color as the main fabrics (see it here). The second time I went all scrappy and used fat quarters (see it here). This time I decided to use accent fabrics that contrast to make the design of the quilt pop out.
I spent a lot of time trying to decide which colors I wanted to use. I'm not great with choosing colors, so I downloaded some color swatches from Art Gallery Fabrics Pure Solids line and started playing around.
Here is what I decided on:
Background fabric - Coconut Milk
Sawtooth Star - Summer Sun
Cross - Verve Violet
Extension of star - Rock Candy
Corner accents - Aero BlueI had someone recently reach out on Instagram and say that they thought the pattern looked so complicated. And I'm here to tell you it really isn't! The Sunrise Star Quilt Pattern is for the advanced beginner quilter. There are no hard elements in this pattern.
I will say however, this is not a fast make. Several of my quilts are a quick quilt to sew, this isn't one of them. There are several different units to sew for each block, for this reason it takes longer to make the quilt.
Sunrise Star has four sizes included in the pattern:
Baby 42 in. x 42 in.
Throw 56 in. x 70 in.
Twin 70 in. x 84 in.
Queen 98 in. x 112 in.
I don't mind quilting my own quilts. However, I get burned out on it. When I live in India I quilt all my own quilts. When I visit the US I prefer to spoil myself and send my quilts out. It's nice because it saves me time and they come back so beautiful!
I really don't love quilting twin size or larger. It gets hard to pull the quilt through the machine keep lines straight when the quilt is that large. So I sent this quilt out to be quilted by Kait from Knot and Thread Design. She does all my quilts and does an excellent job!
She helped me choose the panto (quilting design) for this quilt. My daughter loved it because it has flowers incorporated. We used an off white thread so it would blend in with the quilt top.
This quilt is sure to get lots of snuggles in the coming years and I can't wait.
Make sure to get your copy of the Sunrise Star Quilt Pattern and get quilting!
This blog post contains affiliate links from which I may get a percentage of purchases.
]]>
The focus of this quilt is the four patch block. It's the perfect beginner quilt block to learn. Why? Because it doesn't require trimming and it's easy to get a perfect point. When the seams are nested your points are guaranteed to come out just about perfect.
I included four sizes in this pattern. This way everyone can find a size they want to make.
Quilt sizes:
One more thing I love about this pattern? You can use 2 1/2 inch precut strips for the background fabric. This makes sewing this quilt so much faster!
This version of the Slightly Scrambled Pattern really shows off the diagonal lines going through the quilt.
If you don't know how to chain piece, this is a great quilt to practice on. I like to chain piece the 9 elements in each block together. This means I can batch sew a whole bunch at one time.
After I finished piecing the blocks all together I chain piece the quilt top. It makes piecing the quilt top go very quick. You can see in the image below a picture of the quilt chain pieced on the left and then sewn together on the right.
The backing fabric for this quilt is absolutely beautiful. I went to my local quilt shop and chose it. I really didn't care it it matched the quilt top perfectly, I figured it was close enough. But also, it makes the quilt a reversible quilt. The backing fabric is called Honey Metallic Patchwork Daisy.
I sent this quilt to be quilted by Kaitlyn from Knot and Thread Design. She always does the most amazing job. She helped me choose a panto for the design.
I used more fabric from the Reading Nook line to bind the quilt. The fabric is called Macaron Heirloom.
This blog post contains affiliate links from which I may get a percentage of purchases.
]]>
Slightly Scrambled is just that, a patchwork quilt pattern with a diagonal design in one direction and a bit of chaos everywhere else. It's a block based pattern for the beginner quilter which focuses on the four patch.
The four patch is a great block for the beginner quilter to master. With nesting seams, it's easy to get a perfect point and there are so many ways to make them. Strip piecing is used in the Slightly Scrambled Quilt Pattern mostly because there are so many four patches to make. Using this method speeds the process and allows for a larger combination of four patches to be made.
Slightly Scrambled has two versions. One is a bit more organized with two main fabrics and splashes of accent fabrics. That version uses yardage and precut packs or scraps.
The second version is scrappy looking, with ideally a variety of fabrics in each block. This is made using fat quarters so the fabrics throughout are varied.
I made this modern quilt using the second version.
The Slightly Scrambled Quilt Pattern is available with four sizes:
The Slightly Scrambled Quilt Pattern is a modern quilt pattern designed for you to easily piece and easily find fabrics for. I designed it so the beginner quilter could learn a couple new skills like strip piecing, four patches and nesting while also gaining confidence in their craft.
Get your copy to join the fun and don't forget to share your version on Instagram. #slightlyscrambledquilt
For starters let's talk about pillow size. I wanted my pillow to be pretty full. I also wanted to upcycle a pillow I already had and not buy a new one.
I started by measuring the couch pillow I wanted to use. It came out to be about 18 inches x 18 inches. Because I wanted the result to be full I decided to make the cover around 16 inches and so the pillow would fully fill the cover.
First, let me say in this example I am using 4 1/2 inch x 4 1/2 inch four patch units. I did the math and decided to sew 4 units x 4 units. This would make the result 16 1/2 inches x 16 1/2 inches. Note: Each seam takes away 1/2 inch.
Here is a little equation to figure out your math:
block size x number of blocks in the row = total - (number of seams x 1/2)
in my example:
4 1/2 in. x 4= 18 in. - (3 seams x 1/2 in.) = 16 1/2 in.
Once you have the math figured out, lay out your patches.
Sew your four patches into rows and and press seams in each row in alternating directions. Then, sew your rows together. I like to press these seams open to reduce any bulk when quilting.
Now it's time to make your quilt sandwich like you would a regular quilt. Cut your backing and batting two inches wider that the pillow top. Place a piece of backing down, right side up. Then, place down your batting. Lastly, pillow top right side up. Baste. Quilt as you prefer.
Trim around your pillow top and square up edges if needed.
Next, cut two pieces of fabric (12 in. x 16 1/2 in.) for the back of the quilt. The fabrics need to overlap in the middle of the back of the pillow and we need some fabric to hem the edge. So that is why I cut 12 inches x 16 1/2 inches.
Hem both pieces of fabric on one of the 16 1/2 inch edges by folding the fabric over twice and pressing. Then, sew 1/8 in. away from the folded edge.
The Slightly Scrambled Quilt Pattern includes directions for 5 inch precuts, yardage and fat quarters. You can also use 2 1/2 in. precut strips (like a Jelly Roll) for the background fabric. I like to write my patterns so that most quilters can find a cut of fabric they might already have on hand and begin cutting.
Slightly Scrambled is written with four sizes:
The throw size of this pattern uses 15 fat quarters. This means it's pretty easy to find or coordinate a bundle.
This pattern assumes that the quilter has some quilting experience and can sew a consistent 1/4 inch seam.
It's important with each block of this modern quilt pattern to use a variety of fabrics in each block. I tried to spread out the fabrics, designs and colors in each block and as much as possible tried not to double up fabrics. This isn't always possible. When the blocks get sewn into the quilt it isn't as noticeable if two of the same fabrics are in one block.
Most of the sewing for this quilt is fast straight sewing. So even if you are an experienced quilter, this is a fun, fast quilt to make.
The nice thing about Slightly Scrambled is you really don't have to plan that much ahead when laying out the blocks to sew them into rows. I laid out my blocks to get the general idea of the quilt, then randomly sewed them into rows. After pressing I decided which order I wanted the rows to go in. Unless you are using directional fabric the blocks can be flipped upside down, which means the rows can be too. So if some fabrics were touching that I didn't like, then I just flipped the row or changed the order of the rows.
I went to my local quilt shop and looked for backing fabric. I decided to go with tiger fabric because... why not? I think it is so cute! I am all about choosing cheap backings and a lot of times choose solids for this reason. However, every once in a while you have to splurge and get the tigers. Right?
While we have been in America I have decided to spoil myself and try to not quilt any of my own quilts. When I live in Asia I quilt all of my own quilts and I get tired of it. It's hard to think of new designs and get inspired to quilt. All that to say, I sent this to Kait from Knot and Thread Design. I saw on Instagram another quilt with the Thumbprint Panto. I asked if she had it and she did! So that's what we went with.
Here is the funny thing about pantos. When I look at the designs on quilters websites I don't always love them. But, when I see other quilters use the same panto on their quilts and I can see what it would look like quilted, then I like them. If I hadn't seen another quilt with the Thumbprint Panto I never would have chosen it from Kait's website.
If you aren't quite sure which design to choose or you are sending a quilt out to a long arm quilter to the first time and have no idea what you want, I suggest looking at other quilters to see what you like and dislike.
The quilting on this quilt added such nice texture to the quilt. I just love how it turned out and the thread choice.
Slightly Scrambled may be designed for the beginner quilter. But as an experienced quilter I loved making it. The four patches are such a classic block and it's always fun to play with colors and fabrics in new modern quilt patterns.
Buy a copy of Slightly Scrambled today and start working on those four patches!
This blogpost contains affiliate links from which I may get a percentage of purchases.
You can find a copy of Kailia's Quilt Pattern here.
The 2 at a time method helps get the scrappy look of the quilt by getting as many combinations of fabrics as possible. It also allows the quilter to use smaller scraps from their scrap bin for the quilt than say the 8 at a time method.
I made my scrap version into a rainbow version. You can find a blog post about that quilt here.
Kailia's Quilt isn't written for just scraps. It's also fat quarter friendly and precut friendly. By precuts I mean 1 1/2 in. precut strips. Moda fabrics makes packs of fabrics called Honey Buns which would work perfectly. They also make Charm Squares (5 inch precuts) which would work perfectly for the HST units.
But my favorite way to make the Kailia's Quilt Pattern is by using large packs of fat quarter bundles. I had several of these when I wrote the pattern which had been lying in my fabric cabinet for a long time. I just wasn't sure what project to use them with. It turned out Kailia's Quilt was the perfect pattern. You can find my versions using my fat quarter bundles here and here and here.
The Kailia's Quilt Pattern is for the beginner quilter. It's a great pattern to perfect your Half Square Triangle. Because of the scrappy look of the quilt, it's important to have as many combinations of fabrics in your Half Square Triangles as possible. For this reason, they are made 2 at a time. I know, this can be a bit tedious. But, the result it worth it.
If you have never made 2 at a time Half Square Triangles you can find a tutorial here. If you are a beginner quilter and haven't perfected your 1/4 inch seam or your Half Square Triangle yet, I suggest purchasing extra fabric and making your squares a 1/4 inch larger than what the pattern calls for. This will give you extra trimming space and little extra room in case your seams are slightly off. It's better to make oversized Half Square Triangles and trim them down, than to make ones that a smidge too small.
The Kailia's Quilt Pattern includes directions for the scrappy version, precuts and fat quarters. So there isn't any guessing, all are clearly written in the pattern.
Kailia's Quilt includes directions for three sizes:
This specific quilt is an oversized throw.
One of my favorite features of this quilt, is it doesn't require any background fabric. Almost all the versions I have made have been from my stash, by just grabbing large bundles of fat quarters. That's my kind of quilt pattern!
Indigo Garden has lots of greens in it. Kailia loved the fabric and I had a fat quarter bundle of the entire line. This was the perfect option for Kailia's quilt.
Kailia wanted a little larger than a throw, but smaller than a twin size. So this quilt has one extra row added for length from the throw size directions. This oversized throw came out the perfect size.
Usually I use regular cotton, quilting fabric for the backing of my quilts. However, Kailia is going to University in Montana. We are not used to cold weather and decided to make it extra warm by adding flannel to the back.
We picked out a high quality flannel fabric. Art Gallery Fabric makes very nice flannels, which are double brushed. This means it is brushed on both sides and makes the fabric extra soft. If you are backing a quilt with flannel, make sure to get a high quality flannel for durability.
Flannel can shrink after being washed. For this reason I washed the flannel before I pieced the backing. I also used a 1/2 inch seam when piecing the backing.
I sent this quilt to Knot and Thread Design to be quilted. My daughter chose the panto she wanted for the quilting. Kaitlyn always does a lovely job and get the quilts back in short order. I highly suggest her for your quilting needs.
Kailia chose a solid green for the binding fabric from our local quilt shop. It frames the quilt nicely, especially since there is already so much going on.
Although green really isn't my color, I just love this quilt and didn't want to let it go. The scrappiness of the quilt works perfectly with the design of the fabrics. I hope this is something she will enjoy for many years to come.
I wanted to make sure that they didn't get lost in my feed and could be a reference for other quilters, so I have all the videos in this post for you. Each is about a minute long. I hope they are helpful.
Here we go...
First and most basic way to sew a four patch.
Next...
This is probably my favorite way.
It's a great way to use up charm squares or scraps to sew four patches. I found that this way was the easiest to get my seams to nest perfectly.
The third way...
Not my favorite, but still easy.
I liked this way as well, however it does require drawing lines down the middle of the squares which the 2nd method does not. So for that reason it's not my favorite just because it takes more time. However, this is also an easy way to use up charm squares and scraps.
The last way, I promise!
This how I usually make four patches.
It's common that a pattern will have you make a large number of four patches with varying fabrics. This is a good way to do that.
This is especially useful if you are using strips like precuts (think Jelly Rolls) to make your four patches.
]]>
You can find my other versions of Jack's Gate on my blog. Read here for the throw size using Andover Fabrics. Look here for the Bed size Jack's Gate Quilt featuring Ruby Star Society. Find the Jack's Gate baby size here.
Jack's Gate is a block based quilt pattern. The blocks are set on point which means the quilt blocks are turned at a 45 degree angle. This can make the piecing a little bit trickier when squaring the sides at the end. For this reason, the pattern is listed for an intermediate quilter.
When quilt blocks, or fabric, are cut on the diagonal, it's called on the bias. This part of the fabric can stretch and pull very easy. If you are a new quilter, trimming a quilt on the bias can be frustrating if the fabric stretches.
If you are a newer quilter make sure not to pull your fabrics, especially when pressing them. This can stretch the blocks and they won't all fit together or the quilt will ripple.
Jack's Gate includes flying geese and half square triangles. If you haven't sewn flying geese, you can find a tutorial on flying geese here. They aren't hard, you just have to go slow and be consistent with the 1/4 inch.
Jack's Gate has three sizes:
I used the squiggly stitch on my Janome sewing machine to quilt this Jack's Gate. I realized after I had finished and bound the quilt that there is a row where the tension was way off. I meant to take the row out and redo it, but I had forgotten.
So I took it out after. This is my first time doing this and I was kind of nervous to quilt a quilt already bound.
First, I figured out which stitch length I used for the rest of the quilt. Starting as close to the binding as I could get I locked my stitch in then restitched the row and then locked my stitch at the end of the row.
I also made sure to sew in the same direction as I had previously (if you remember, which I did). This will help prevent some bunching between the rows. When you switch directions in your quilting lines there can be a strange ripple affect to your quilting. So I like to keep the quilting all going one direction.
If you have a better way to fix stitching on a quilt that has already been bound please let know, I would love to hear.
This Jack's Gate Quilt turned out to be a nice large throw. It's also nice and thick, it has a medium loft batting inside, combined that with the two quilt tops, I'd say it's a one of a kind quilt. But all homemade quilts are, right?
Kailia's Quilt is fat quarter, precut and scrap friendly. I wrote it so all these options were included. This makes the pattern super versatile. It also means that most quilters would be able to make a version of the Kailia's Quilt without buying any fabric.
Part of the reason I designed this pattern was because of my overflowing scrap bin. I generally don't like keeping scraps around. So when I start to have too many I tend to give them away. I wish I had room to organize them and keep them, but our flat in India is small and I keep all my fabric in my bedroom. So my scraps need to live in a very small bin.
I had been keeping the extra binding strips from quilts. So my bin had lots of these very random long strips of fabric in them. I wasn't sure what I was going to do with such narrow strips of fabric. That's when I decided to design the Kailia's Quilt pattern to incorporate thin strips and scraps.
I have made several Kailia's Quilts so far, but this scrappy version is by far my favorite. It is probably partly because of the amount of time I put into making it. Digging through a scrap bin and figuring out which pieces of fabric are the correct size to use for a quilt takes a long time, especially when it goes with a color theme like this one.
Kailia's Quilt is written for the beginner quilter. It's a great pattern to master the 2 at a Time Half Square Triangle method. If you don't know what that is you can find a tutorial of that here.
With so many Half Square Triangles (HSTs) why doesn't the pattern use 8 at a Time or some other more efficient method of making HSTs? It's important for the scrappy look of the quilt to have as many combinations as possible of fabrics. For this reason, the pattern uses the "2 at a Time" method.
If you are using precuts or fat quarters, strip piecing is written in the pattern to make the striped blocks go a bit faster. For those using scraps, sorry, no strip piecing for you. :)
Kailia's Quilt has three sizes:
This quilt took me a couple months. In fact, I had a stolen several bowls from the kitchen to sort fabrics into from my scrap bag. I am sure my family found it irritating that the largest mixing bowls were missing for two months.
After I had a good bit of blocks in a colorway I would lay them out on the kitchen table and make sure I had enough blocks and variety of fabrics.
I sewed each row at a time following the Kailia's Quilt measurements for a throw size.
This quilt took so much work that I didn't want to quilt it myself. So I put it to the side to bring it back to the states with me a couple months later. I had my friend, Kaitlyn from Knot and Thread Design, quilt it for me.
I chose a panto which I thought kind of looked like a rainbow, but also wasn't the traditional rainbow or baptist fan design.
If you are thinking of making a rainbow, scrappy quilt here are some thoughts (take 'em or leave 'em):
Plan which colors to use ahead of time.
Sew one colorway at a time so you can easily keep track of what is left to do.
If you are color challenged like me, get help!
If you are a bit short on a color, cut into your stash.
Quilt Details at a Glance:
Pattern: Kailia's Quilt
Panto: Sunrise Fan
Quilting By: Knot and Thread Design
]]>
This quilt has five fabrics (four accent fabrics) and all of the blocks are exactly the same. I like this classic and simple look.
When I designed the pattern I used these coral/salmon colors, so I wanted to create a version similar to the one in my brain and on my computer. You can see the original design below.
I was in India when I ordered the fabrics for this quilt. I ordered the fabric ahead of when I visited the states so they would be waiting for me.
One thing to know about ordering fabrics online is that the colors on your computer or phone don't match exactly with the actual fabrics. The colors are close, but there is always a slight difference.
I am colorblind so I already have a hard time with colors. Ordering fabrics online is easy, and for me is much less overwhelming than going into a quilt shop. I struggle with in store shopping, especially for solids because I get overwhelmed by the colors.
However, if you don't struggle with colors, shopping in person in a store is important to match the correct color or to make sure a fabric has the correct design you are looking for. I also think it's important to support your local quilt shop.
In this case I couldn't go to a local quilt shop to get my fabrics, so I pulled out my Pure Solids color card by Art Gallery Fabrics. This allowed me to choose my fabrics from the exact color I would be getting. It also narrows the choices to one brand which is less overwhelming to me.
If you love a certain brand of solid fabrics I suggest getting a color card. It gives ideas of colors you can work with or fabrics that are available. I have a color card for Kona solids and Pure Solids.
Since I live in India, why don't I use the fabrics there? Well, for one I live in a very small city without a great fabric market. Also, the quality of fabrics I have access to differs depending on what the store currently has available. One time I bought some white fabric and every 3/4 yard had a permanent stamp in the middle of the fabric. I ran out because obviously a lot of the fabric wasn't usable. When I went back they had no way of matching what I had or sourcing it. For this reason I buy a lot of fabrics from reliable sources and bring them back with me to India.
For this quilt I used the following colors from the Pure Solids collection by Art Gallery Fabrics (see pattern to reference where each fabric is in the block):
Sunrise Star is for the advanced beginner quilter. Each block has a good bit of piecing, but none of the piecing is anything hard. If you know how to sew half square triangles and flying geese then you should be good to go. I would not suggest this pattern for anyone's first quilt.
This modern quilt pattern has four sizes:
I have only ever sent my quilts to one person to quilt, that is Kaitlyn from Knot and Thread Design. She does excellent work and usually has a quick turn around time.
She is also great at helping choose a panto with indecisive customers like me. For this quilt we chose the Modern Tile panto. It turned out perfect.
I used left over fabric from the accent fabrics to sew on a binding. If you make the fat quarter verion save your scraps because there should be enough to make a scrappy binding to go around the edge.
Quick details on the quilt:
Pattern: Sunrise Star
Fabric: Art Gallery Pure Solids
Quilting by: Knot and Thread Design
Panto: Modern Tile
This post contains affiliate links from which I may get a percentage of purchases.
This pattern is written for the advanced beginner. Each block has a good amount of sewing. But, the sewing elements used in the quilt are not necessarily very difficult.
To make this quilt you should know how to sew and trim:
It is important to have a consistent 1/4 inch seam before taking on this quilt, otherwise the pieces of the quilt won't quite fit together correctly. Because each element of the block interacts with the others, if one unit is off it will mess up the design of the block.
As I said earlier, this pattern was written with two variations. You can buy fabric for a yardage version or a fat quarter version.
I sent this quilt to Kaitlyn from Knot and Thread Design for quilting. I was looking for a geometric design with curves. So I decided to have her quilt with the Arches Panto.
Look at the beautiful quilting! I just love the texture and the design.
It's official! This Sunrise Star Quilt is now my favorite. In fact I love it so much I'm a bit afraid to use it.
Don't forget to get a copy of the pattern. You can find it in my shop. I can't wait to see what you make.
Pattern: Sunrise Star
Panto: Arches
Quilted by: Knot and Thread Design
This blogpost contains affiliate links from which I may get a percentage of purchases.
]]>
We are at week 8 in our Kailia's Quilt Sew-a-long and it feels so good! Who is ready to put some rows together and finish this quilt?
I have already seen several finished quilt tops on Instagram and they were so beautiful! Don't forget to share your quilt tops by Sunday evening for a chance to win our grand prize… more on that in a minute.
You can randomly piece the rows together, this is what I like to do, making sure that two of the same fabrics are not touching. Then, I lay the rows out to see what order they would look best sewn together. I mostly check to make sure that there is a variety of fabrics in each section of the quilt and that the same fabrics aren't together.
Or you can lay out all your blocks and sew them together in a more organized fashion. I don't do this mostly because I don't have space, and because this quilt is so scrappy you can easily make it work without lots of planning.
Since we are finishing up our quilt tops this week, I wanted to remind you that Kaitlyn from Knot and Thread is offering 20% off quilting on all Kailia's Quilts made during the sew-a-long. They need to be sent to her by August 31 and make a note that you were part of the sew-a-long.
For the final giveaway of our sew-a-long I am giving away 3 patterns from my shop, and as mentioned earlier, Katie is giving one lucky winner free quilting for their Kailia's Quilt.
To enter post a picture of your finished quilt top on Instagram using the hashtag #kailiasquiltsal Make sure that your account is public so others can see your finished quilt.
Thank you for being a part of the Kailia's Quilt Sew-a-long! It means so much to have your support!
Modern Quilting
4649 E Cactus Rd, Phoenix, AZ 85032
Modern quilting was a bright, large, beautiful space. They had a beautiful selection of fabrics... Art Gallery, Kona, Moda, Free Spirit, Batiks... to name a few.
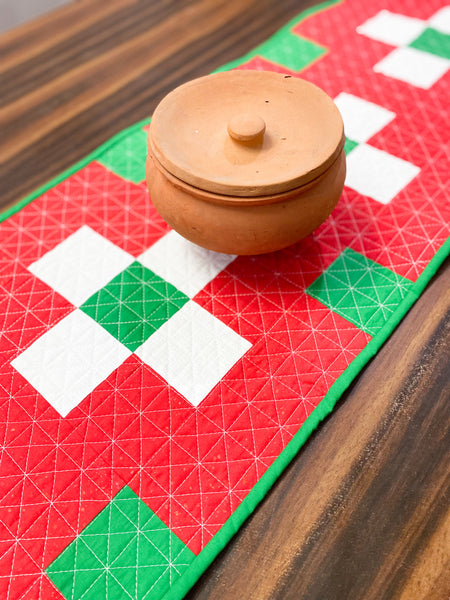
I noticed a block of the month that I absolutely loved right by the front door. You can see it in the picture below.
Modern quilting had a good variety of kits and patterns to give you ideas. If you love Kaffe, they had a nice section of his fabrics.
Overall, this was a lovely shop my mom and I enjoyed going to. I got a bundle of curated solids. I think my mom also picked up something and they had a bit of the reproduction prints she likes so we were both happy!
Oh, I forgot the best part. They had an area for husbands. My dad loved sitting in the chairs and reading the airplane magazines. My daughters appreciated a break too.
Next, was a small shop but still just as lovely...
Hummingbird Lane Fabrics and Notions
6 E Palo Verde St #11, Gilbert, AZ 85296
Someone told me about this shop on Instagram so I wanted to check it out. This shop was in the middle of reorganizing their store when I went. Their shop is small, but has modern, new fabrics. I saw lots of Ruby Star Society, Tula Pink and Windham Fabrics. I bought some cute fat quarters from Tula Pink's new collection.
Their packing was very nice and I loved how their fabrics were organized by color on the wall. Hummingbird Lane Fabrics in online, so if you can't make it to the Phoenix area you can still order from them.
The fabrics were laid out nicely on the ends to give you ideas. In fact, my mom bought me some more Tula Pink from her new line. Who can resist hippos on bright pink fabric?
Arizona Quilts had some nice kits and patterns. They also had chairs by the door for those not interested in quilting. My dad made a friend while waiting for us. :)
Next on the list I didn't even know about. But my mom had been here before she told me we needed to visit it.
Mulqueen
3716 E Main St, Mesa, AZ 85205
I don't think I have ever been in a store quite like Mulqueen before. Wow! It is it's own beast. I was overwhelmed!
Mulqueen sells sewing machines, fabrics and vacuums. Their fabric section actually is a small section of their store. They have a large section of sewing machines (lots of brands). You can also drop your machine off to be serviced.
I think this store has about every notion ever made. Also, they had so, so many rulers, patterns and thread. I was amazed at the variety of items they sold.
The fabric is not the newest lines, but it is sold inexpensive. So if you are looking for something that has recently come out this probably isn't the place. However, they carried large brands like Kona, Moda, Riley Blake, Andover and Batiks.
If I lived locally this would be a great place to have my machine serviced or to look for any sewing supply.
I heard about one more store on Instagram, so we decided to visit.
35th Ave Sew and Vac.
3548 W Northern Ave, Phoenix, AZ 85051
This store was easy to find and well organized. They sell Bernina machines right up front and have a good selection of quilt patterns including bag patterns and supplies. They seemed to have a good community vibe, and had a birthday party going on for one of the ladies the day I visited.
My girls were very happy to find some princess fabric. I also noticed a lot of Batiks.
All the stores we went to had rooms for classes. So if you are in the area call or check online to see if they have classes.
All of the stores are also online and are linked above in their names.
My mom and I enjoyed our quilt shop hop, my kids not so much. Special thanks goes to my dad for driving us everywhere and stopping for my afternoon coffee inbetween. :)
If you are in the Pheonix area I hope you are able to support one of these local shops and meet some other quilters.
Let me know if I missed any shops I should visit next time.
|
If you are making a rainbow quilt or want each row to be a different color, this week will take more planning. I suggest laying out each row like below and making sure you have the correct number of HSTs and blocks for each. Seeing how all the puzzle pieces will fit is important since each row is different.
See you next week!
Shelby
]]>See you next week and thanks for following along!
It's time to get started on our Half Square Triangles. I'm ready, are you?
If you are an experienced quilter you might be wondering why the pattern doesn't have 8 at a time Half Square Triangles (HST). Am I just trying to drive you crazy by writing it with 2 at a time?
I know it takes more time to sew 2 at a time HSTs, but for this pattern it's important to get as many combinations of HSTs as possible. This really helps with the scrappy look we are going for.
If you are new to quilting and want a tutorial on 2 at a time HSTs, I have one for you here.
Since we have so many HSTs to sew I decided to break up this process into two parts. This week we will sew and press our HSTs and week 5 we will do all the trimming, or you can do half the HSTs this week and half next week. Either way, I was trying to make the process a little less overwhelming.
Giveaway!
I decided I needed to find a middle ground and upgrade, without spending an arm and a leg.
For starters I looked for a new wool pressing mat. I love the one I use in India, but it's small. I have been wanting to get a larger one. I knew I could easily pack a wool ironing mat to travel with me back to India. So I decided to get a Precision Quilting Tools 17 in. x 24 in. wool mat. This is the one I bought here.
It's wider than my ironing board, but still fits well enough. If you do buy one I want to warn you to make sure you only use it on a heat resistant surface. I have heard of people cracking their granite counter tops because they were using the wool mat on top.
A wool pressing mat works almost like a double press. It's magical if you ask me. The heat from the iron is absorbed in the wool mat, which radiates back from the bottom giving the fabric a press sandwich. It's well worth the money if you ask me.
Now for the iron...
I have heard a lot about Oliso and seen other quilters using and loving their irons. However, their large iron runs around $200, and I'm not ready to drop that kind of cash on an iron.
I realized a lot of the frustration I was having previously was with pressing smaller units and blocks. The iron I was using didn't have a very good point on the end which made it hard to press seams open. Since my issue was more about pressing small blocks and not large areas I decided to look at mini irons.
I ordered the Oliso M2 Mini Project Steam Iron. This set me back $60 which is much better than the $200 their larger iron costs. I wasn't sure if I would like this model. Instead of having a handle to hold onto you grip the sides because it is so small. I have to say it took a couple days to get used to, but now I love it!
This iron has helped so much with pressing smaller quilting blocks and seams!
I only have one complaint, when I added water to the iron it ran out the bottom when I set it up straight. It could be operational error because my daughter threw out the instruction manual before I could read it. A rubber pad came with the iron, so maybe I'm not supposed to place the iron upright when I have water in it?
If you know the answer to that question let me know. I need to do a little digging.
All in all, my ironing upgrade cost me $48 for the wool mat and $60 for the mini iron... so $108. I'm super happy with my purchases. When I need to iron a larger piece of fabric or a whole quilt I use the ironing board and the regular sized iron. This works just perfect for me.
This post contains affiliate links from which I may get a percentage from purchases.
Just a reminder, as a whole Kailia's Quilt has a random look about it. But it's constructed in block form so we can have more control over pairing the fabrics. Ideally each block will have all different fabrics in it. Spacing out fabrics with similar colors and designs will help the pattern of the quilt stand out more.
I am usually not much of a pinner. However, with this quilt I use all the pins! You can see above I take the time to pin each seam when sewing these units together. I suggest putting the pins in at an angle like above. This allows you to sew right up to the seam before pulling the pin out.
This week we are cutting our fabrics. Thankfully, Kailia's Quilt has simple cutting. Although, if you are a beginner quilter make sure to be exact with your cuts, especially the 1 ½ inch strips. Those pieces are already thin and it's easy for the fabric to shift slightly when cutting if you're not careful.
To avoid frustration I like to change my blade when cutting fabric for a new quilt, especially since we will be trimming half square triangles soon.
Precut quilters, most of your cutting is already done for you. So this week is pretty easy.
Scrappy quilters, this week is a big week for you! I think cutting my fabric was the most time consuming part of making my scrappy version of Kailia's Quilt Pattern. I started this process by digging through my scraps and pulling out the colors I wanted to use first, then divided them into piles depending on which cut I would use it for.
Because my scrappy quilt was a rainbow I organized my 5 inch x 5 inch pieces by color to help me keep track of how many more I needed. If you are making a scrappy quilt with no organization, then the cutting won't take quite as long because you won't have to organize by color.
Fat Quarter quilters, this week is also a pretty fast week. After changing the blade of my rotary cutting I was able to cut through 3 or 4 layers of fabric. So my cutting was done super quick. It's all stacked and ready for sewing next week. I decided to use fat quarters for my version, but I added in a couple extra so my quilt will be a row longer than the throw size. This pattern is very adaptable, so make it work for you!
Next week we will be sewing our striped blocks together. It will be fun to see how the fabrics start playing off each other. Until then, follow the hashtag #kailiasquiltsal to see what other quilters are up to.
Make sure to get a copy of the pattern if you haven't already!
Happy Quilting,
Shelby
]]>
The sew-a-long is 8 weeks long. If you are doing a scrappy version or are a beginner quilter and need a little extra time, this schedule should work well.
If you don't have a copy of Kailia's Quilt Pattern yet, this is the week to get it. You can find it here.
Let's talk fabric… So far I have made Kailia's Quilt using fat quarter bundles and scraps. This is a great pattern to pull fabric from your stash, or as in my case, dust off those large fat quarter bundles you have been hoarding.
When I made my rainbow version (below) I used two bowls to sort scraps with. All pieces large enough for the half square triangles went in one bowl, and all pieces for the striped blocks went in another. This made the cutting process easier because I knew which size I was trimming each scrap to.
Fabric Suggestions
I asked or looked around some of my favorite fabric shops for some fabric bundles which would work with the throw size of Kailia's Quilt. All of the bundles have 23 fat quarters in a bundle or over. Here are some bundles I found:
|
Kailia's Quilt is a modern quilt pattern geared toward the beginner quilter. This pattern is so versatile because you can use fat quarters, precuts or scraps. Any way you make it, the end result is a scrappy modern quilt.
Kailia's Quilt Pattern includes instructions for 3 sizes:
As I said for this quilt I used a fat quarter bundle. This has been my favorite method of sewing this quilt so far. It does require cutting, but there is very little waste from each fat quarter. Also, if you use precuts or fat quarters there is some strip piecing for the striped blocks which will save time.
Make sure to get a copy of the pattern. I would love to see your version of Kailia's Quilt Pattern. Share with me on Instagram, #thenomadicquilter @thenomadicquilter.